
We hope you love the products we recommend! Just so you know, when you buy through links on our site, we may earn an affiliate commission. This adds no cost to our readers, for more information read our earnings disclosure.
Last Updated on June 24, 2022 by Todd
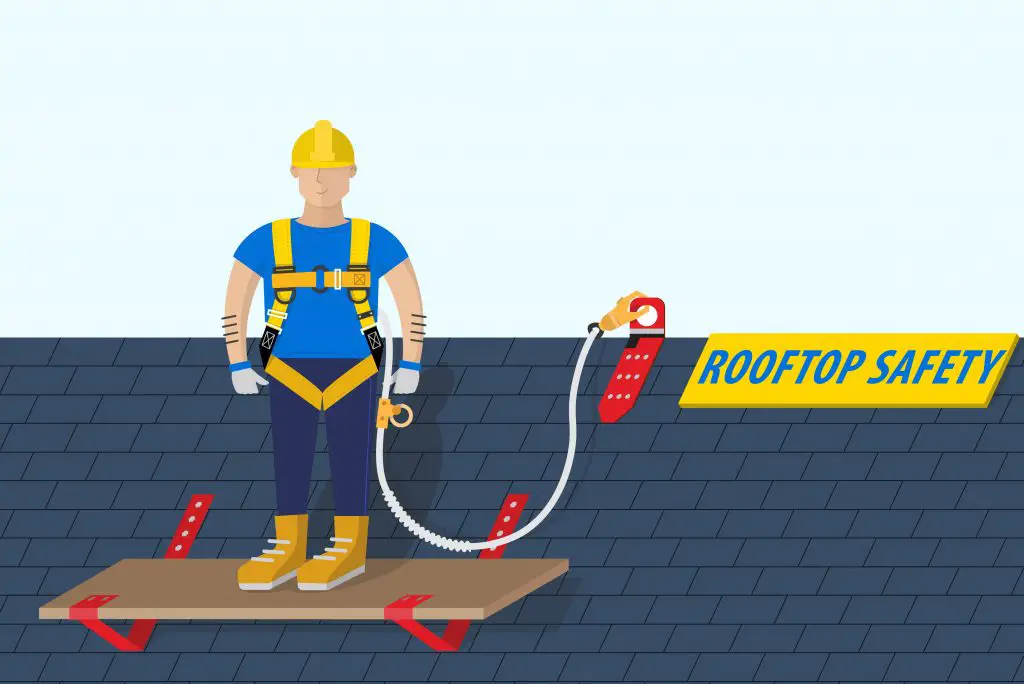
If you’re wondering how to secure yourself on a roof, then you’ve come to the right place. After weeks of research, we’ve put together this roofing safety guide including roof safety equipment recommendations to help you choose the right products.
According to OSHA, wearing a personal fall arrest system (PFAS) is required by law if the worker is exposed to a fall of 6 feet or more.
There are three main elements needed in order to put together a proper personal fall arrest system:
- Anchor Points
- Body Wear (Harness)
- Connectors (Lanyard, Roofing Ropes, Buckles, Rope-Grabs, Hooks, etc.)
Workers must be provided with roof safety equipment and gear in order to do their job in a safe manner. All workers must be trained on how to use the roofing safety gear and how to protect themselves from hazards.
Quick Navigation
How To Secure Yourself on a Roof | Best Roof Safety Equipment
INSTALL A ROOFING ANCHOR
Roof anchors are essential when it comes to setting up a proper roof fall protection system. You can use them on new construction, re-roofing, or any other repair projects.
A roof anchor should be installed directly into a truss, usually over the peak of the roof. They provide a secure connection point for the other safety elements of a fall protection system like ropes, lanyards, and harnesses.
Do not install the anchor into sheathing alone, single trusses, or guardrails. They are not strong enough to support a hard fall.
OSHA requires roof anchors to be rated at 5000 pounds per person. Make sure to double-check that before buying a new roof anchor.
In order to install the anchor on the roof, you need to drive enough nails through the sheathing into the truss or into the rafter.
Drive as many fasteners as needed – usually 16 penny nails – following the anchor’s guide pattern. Every anchor should come with instructions and guideline holes to show you exactly where the fasteners should be driven.
Make sure to use a hammer (not a nailgun) so you can feel if the nails are driven properly. To identify the trusses, you can also pound on the roof area with a hammer and listen to where the sound is more solid.
Types of roof anchors:
01 Temporary Anchors: are designed to be easily reused, removed, or relocated. They come with the D-Ring on top, which is easily visible and really stands out from your surroundings.
02 Permanent Anchors: are designed to remain in one place permanently, being attached to the roof structure, underneath the shingles. They are easy to install and more difficult to remove since they’re placed under the shingles. They are more corrosion-resistant, weather-resistant, and their discrete design won’t stand out from the street.
1. Temporary Roof Anchors
Our #1 Pick: Guardian Fall Protection 00455 Reusable Anchor

We highly recommend this temporary Guardian anchor. It is sturdy, reliable, and most importantly, meets all the safety standards.
We like that it’s compatible with any roof pitch, from flat to 12/12.
Comes with fasteners.
Temporary anchor points are a perfect choice for any roofing or re-roofing project.
They are easy to install, remove, and relocate. Reusable anchors are as efficient as permanent anchors.
But they are not designed to be very corrosion-resistant, meaning that they would be prone to rust or deteriorate if they were left on the roof permanently.
If you’re doing some repairs on an existing asphalt shingled roof, the correct way to install the anchor is underneath the shingles. You need to remove all the old nails and have a clear view of the area where you’re about to install the anchor.
You have to identify the truss visually and also by pounding on the roof with your hammer looking to hear a solid sound.
Here’s a helpful video provided by AllSurfaceRoofing showing how to properly install and remove a temporary anchor:
When you’re done with the anchor, after removing the nails, don’t leave any holes in the truss. Fill them up with roofing cement using a caulk gun like in the video above.
2. Permanent Anchors
Top Pick: Retro-Fit Super Anchor Safety Permanent Roof Anchor

This permanent roofing anchor from Super Anchor Safety complies with OSHA and ANSI standards.
Can be used on asphalt, metal, and wood roofs and comes with stainless steel fasteners.

These are anchors designed for permanent use, are more corrosion-resistant, sturdy, and made to last.
Some come with one single D-Ring and can be placed on any part of the roof.
Others come with two D-Rings, placed on both ends and they’re designed to be installed over the roof pitch.
The design of a permanent roof anchor is usually discrete so the ring and anchor wouldn’t stand out or be visible from the ground.
Some people even paint them in the same color as the roof (see also ‘How To Choose Roof Color For Red Brick House‘) to reduce their visibility even more.
A permanent anchor is designed to be placed under the shingles.
You have to remove the old roof shingles covering the area where the anchor point will be installed. Install it into the truss and then cover the anchor (except the D-Ring) with the shingles.
3. Standing Seam Roof Anchor

Standing seam roofs are extremely slippery and dangerous to walk on. They are also easy to damage.
How do you secure yourself on a standing seam roof? Using a fall protection system designed especially for this type of roof.
WEAR A ROOF SAFETY HARNESS
Best Roofing Harness: Guardian Fall Protection Bucket

We recommend the Guardian Fall Protection System OSHA-approved safety harness. It comes with the following items included:
- Reusable Heavy-Duty Anchor with Screws
- Universal Full-Body Harness with 5 Adjustments Points
- 50-Foot Lifeline
- Built-in Shock Absorbing Lanyard
- Storage Bucket
- Hook Mechanism
The kit also comes with all the necessary clutches, buckles, and rope grab hooks that allow you to safely travel up and down the line. The harness comes in a universal size and fits a wide range of body types.
Comes with a reusable anchor (temporary) and with the fasteners needed to install the anchor. Can even be used on 12/12 roof pitches.
The lifeline is made from a blend of materials meant to provide maximum safety. It’s also kink-proof and moisture-resistant.
The shock-absorbing lanyard is a must for any personal fall arrest system. In case of a fall, it cushions the impact and saves you from a hard impact fall that can result in injuries.
Wearing a full-body safety harness is the next essential thing when it comes to rooftop safety.
The safety harness for roofing should feel snug on your body, but not too tight so you can still move freely.
- Inspect the roofing harness for any damage
- Put on the harness and adjust the shoulder straps
- Make sure the D-Ring is at the upper middle part of the shoulder
- Adjust the Leg Straps
- Adjust the Chest Straps
- Final adjustment for a fit snug but still allow for a full range of movement
Make sure to inspect the webbing for scratches or defects.
How to use a safety harness on a roof | Video Explainer
USE CONNECTION ELEMENTS
1. Lanyard: Reduces the Impact Forces From a Fall
#1 Top Pick: Guardian Fall Protection Lanyard

This lanyard is an ideal high-quality safety line that will keep you secured on the roof with its shock-absorbing feature.
The material is of great quality, and overall it’s very lightweight so it would not slow you down.
If you fall, even if you wear a harness, you can get seriously injured from the harsh impact of the sudden stop. Luckily, there is a solution that reduces the speed and cushions the impact: the lanyard.
The lanyard is a crucial connection element attached to the D-Ring of your harness, that reduces the speed, cushions the impact and protects your back from injuries.
How does it work? In simple words, a lanyard is designed with material sewed together. In case of an impact, that stitching is taken out, decreasing the impact force and acting as shock absorber.
2. Roofing Rope Grab
#1 Top Pick: Guardian Fall Protection GRAB-R Rope Grab

This rope grab won’t allow you to move more than you allow it to. It fits 5/8 inch or 5/16 inch ropes.
It’s reliable and designed to lock automatically in case of a fall.
A roofing rope grab locks onto the rope and acts as a brake. It lets you adjust how much rope you need and it won’t allow you to move more than you want to.
Lifelines (ropes) are usually longer than needed, and you have to adjust the length of the lifeline to block you from going too far.
3. Sturdy Roofing Rope: Needs to be OSHA Compliant
#1 Top Pick: Guardian Fall Protection Vertical Lifeline Assembly

We highly recommend this lifeline assembly because it is reliable, premium quality, and resistant to abrasion and cuts.
It comes with these components: a shock absorber, lanyard, and two double snap hooks.
The lifeline is also ideal for wet conditions, due to the poly steel material blend.
Choose a safety rope for roofing that is OSHA Compliant.
It is very important to look for a sturdy rope that can withstand the impact of a fall.
ROOF SAFETY BRACKETS AND PLANKS
Best Safety Bracket: Qualcraft 2500 Roofing Bracket

This adjustable roofing bracket by Qualcraft is the one we recommend.
It’s OSHA compliant, easy to install and easy to remove, made in the USA, and durably built with all-steel construction.
High-pitched roofs are not easy to walk on. You need slip-resistant roofing shoes and a safe, sturdy, and flat area to stand on while roofing.
Roof brackets are installed without damaging the roof surface, and offer a flat area to step on.
To have a larger area to walk on, place planks on top of two roof brackets.
STURDY EXTENSION LADDER
#1 Extension Ladder: Louisville Ladder Fiberglass

This reliable ladder can hold 300 pounds and is ANSI approved, making it ideal for roofing and framing conditions.
Comes with a sturdy Maxlock system tested in extreme low-temperature conditions, and with slip-resistant rungs.
To access the roof you need a rugged yet lightweight ladder.
You have to secure the ladder correctly and around three feet (1 meter) higher than the gutter. You should also tie the ladder to the roof, to make sure it stays in place.
There are many types of ladders, make sure to check for these three things:
- It must be OSHA compliant
- Load Capacity
- Extension Length
Fiberglass ladders are great to use around electricity since they offer electrical protection. They are a bit heavier, you might need another person to set it up.
Make sure to place the ladder on flat ground. If you don’t have this option, then it’s best to use a ladder leveler wedge.
How to secure a ladder to a roof:

Special thanks to our designer Andreea Mica for the illustration.
Sources:


I bought a Guardian harness about 4 months ago to work on a cabin I’m building. I was working on a roof and stepped on a tool. I lost my balance even though I was holding the rope with one hand. I stopped short of the edge. That was a lesson. I will never go up without a harness and I will pay more attention to where the tools are.